Because of the recent domain change of my blog, I decided to completely start over again with my lab in Azure. I’ve been working with Desired State Configuration Configs in Azure for quite a few years, but never used them for my own lab environment.
It felt a bit overkill to do that, but now I wanted to start over and do everything right.
This step-by-step installation guide explains how to create a DSC Configuration in Azure Automation and how to apply this on your domain controller in Azure.
Prerequisites
- Azure Automation Account
- Including these credentials:
- DomainAdminCredential
- SafeModePassword (Pick a random username)
- Including these variables:
- DomainName - Contains the domain name for Active Directory (e.g. mylab.DevSecNinja.com)
- Including these modules from the Modules Gallery:
- xActiveDirectory
- xStorage
- xPendingReboot
- Including these credentials:
- An Azure Virtual Machine that will be the domain controller, with:
- A data disk
- Ensure you disable caching on both disks as that’s required for domain controllers running in Azure
Installation Guide - Step-by-Step
Configuring Azure DSC
- Ensure you’ve followed the prerequisites steps above, as we depend on it during the installation guide.
- Create the following folder structure on your machine:
- DSC
- DSC_AD_Domain
- DSC
- Copy/Paste Script 1 - DSC_AD_Domain.ps1 from below and save it in the DSC_AD_Domain folder.
- Open the Azure Portal, open Automation Accounts and click on the Automation Account you’ve created based on the prerequisites. Open DSC Configurations, click the Add Configuration button and upload the DSC_AD_Domain.ps1 script.
- After importing the script, you should now see it in your DSC Configurations. Click on the script and click on the Compile button:

- Wait for a couple of minutes for the compilation to complete. Go back to the Azure Portal and ensure that the last compilation has completed successfully:

- Good job! You’ve compiled the DSC Configuration. We can now apply this configuration to a Virtual Machine in Azure.
Apply the DSC Configuration to your Virtual Machine
- Browse and open your Automation Account in the Azure Portal.
- Click the DSC Nodes tab.
- Click the Add Azure VM button.
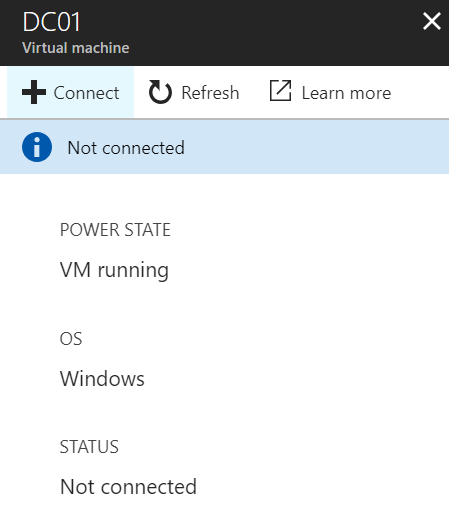
- Select the Virtual Machine you want to manage with DSC and click the Connect button:
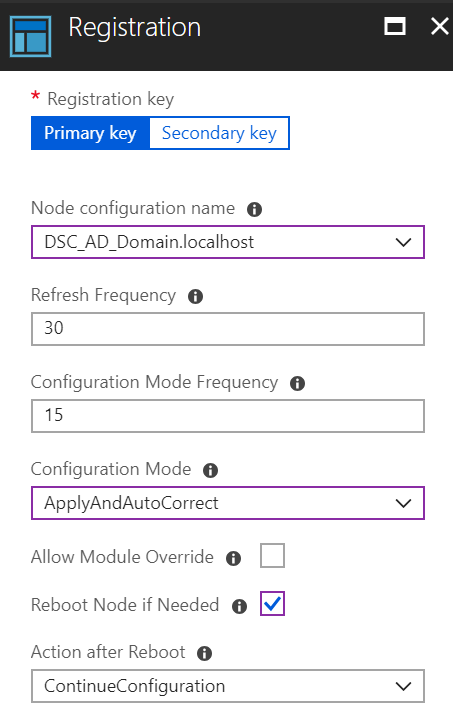
- The Registration Blade will open. Make sure you select the new DSC Configuration you’ve recently uploaded.
Also ensure you select “ApplyAndAutoCorrect” as the Configuration Mode. DSC will now take care of the configuration and ensure it will stay compliant.
It’s very important to select “Reboot Node if Needed”, otherwise the domain creation process cannot proceed as it will need a reboot there.
Be careful with this setting in production though.
Click the OK button so Azure can do it’s magic.
 6. Go back to the DSC Nodes tab and wait for the system to show up there. Also keep an eye on the status of the machine there.
It’s a wrap! Thanks for reading this blog post. Let me know if you have any questions in the comments section. Cheers!
Script 1 - DSC_AD_Domain.ps1
This script was originally written by Michael Green and modified by me.
configuration DSC_AD_Domain
{
    # Import the modules needed to run the DSC script
    Import-DscResource -ModuleName 'xActiveDirectory'
    Import-DscResource -ModuleName 'xStorage'
    Import-DscResource -ModuleName 'xPendingReboot'
    Import-DscResource -ModuleName 'PSDesiredStateConfiguration'

    # When using with Azure Automation, modify these values to match your stored credential names
    $DomainAdminCredential = Get-AutomationPSCredential -Name 'DomainAdminCredential'
    $SafeModePassword = Get-AutomationPSCredential -Name 'SafeModePassword'
    $DomainName = Get-AutomationVariable -Name 'DomainName'

    # Configuration
    node localhost
    {
        WindowsFeature ADDSInstall
        {
            Ensure = 'Present'
            Name = 'AD-Domain-Services'
        }

        xWaitforDisk Disk2
        {
            DiskId = 2
            RetryIntervalSec = 10
            RetryCount = 30
        }

        xDisk DiskF
        {
            DiskId = 2
            DriveLetter = 'F'
            DependsOn = '[xWaitforDisk]Disk2'
        }

        xPendingReboot BeforeDC
        {
            Name = 'BeforeDC'
            SkipCcmClientSDK = $true
            DependsOn = '[WindowsFeature]ADDSInstall','[xDisk]DiskF'
        }

        xADDomain Domain
        {
            DomainName = $DomainName
            DomainAdministratorCredential = $DomainAdminCredential
            SafemodeAdministratorPassword = $SafeModePassword
            DatabasePath = 'F:\NTDS'
            LogPath = 'F:\NTDS'
            SysvolPath = 'F:\SYSVOL'
            DependsOn = '[WindowsFeature]ADDSInstall','[xDisk]DiskF','[xPendingReboot]BeforeDC'
        }

        Registry DisableRDPNLA
        {
            Key = 'HKEY_LOCAL_MACHINE\SYSTEM\CurrentControlSet\Control\Terminal Server\WinStations\RDP-Tcp'
            ValueName = 'UserAuthentication'
            ValueData = 0
            ValueType = 'Dword'
            Ensure = 'Present'
            DependsOn = '[xADDomain]Domain'
        }
    }
}